Long Lost Lore - Featuring Mages Guild
The Ayleid Ruins of Ondil are located underground in the center of the second largest of Summerset Isles – on the central part of this lovely Archipelago called Auridon. Looking at the ingame map Ondil is south of the town of Mathiisen nearby.
Maybe you just stumbled upon the ruins of Ondil in your adventures in Auridon, and got curious enough to try to venture inside; or maybe you heard rumors of a Skyshard within and came to look for it. Perhaps once inside Ondil -- you may have somehow lived long enough to wonder what other mysteries there are to solve in these dangerous ruins - or maybe you simply high-tailed it out of there quick! Yet the only way to truly satisfy your curiosity about these ruins -- is to dare to venture down into its depths! If you are in the Aldmeri Alliance, and you are wondering about what all the excitement could be over finding Lore Books for the Auridon Mages Guild; this is your chance to discover just how fun that can actually become!
You see, Ondil will be the first part of your first Aldmeri Mages Guild Quest and will send you into these dangerous ruins. However, if you are not in the Aldmeri Alliance, you can try to clear the ruins of Ondil as part of your Dungeon Delving explorations and achievements, by traveling to it from another province (Daggerfall Covenant or Ebonheart Pact). This Ondil Guide (which includes Ondil’s association with the Mages Guild Long Lost Lore Quest), will help you make your adventure of Ondil the most rewarding; should you survive Ondil’s terrors.
Joining the Mages Guild before Braving the Ruins of Ondil!
The best and certainly the most rewarding way to do Ondil is to get the Quest for the Ruins of Ondil by joining the Mages Guild in Auridon right off the bat, and thereby get your first Mages Guild Quest; which will send you there to look for Lore Books.
The Aldmeri Mages Guild can be found in Vulkhel Guard in Auridon, and it is recommended that you join it early on and start their skill line even if you are not yet ready to face underground terrors; but at least join it before going to Ondil.
Join the Mages Guild by talking to Curinure who is easy to spot right inside the first floor of the Mages Guild, after coming in the front door. Next, talk to Valaste to get your first Mages Guild Quest. The Long Lost Lore Quest is the first initiation quest of The Mages Guild after you join their Guild; which will direct you to dangerous ruins, and which this very first time will turn out to be the infamous Ondil!
You now realize that finding Lore Books for the Mages Guild is much more exciting than just the fun of randomly coming across books in your travels across Tamriel. This is a Level Eight (Level 8) quest, so if you are not ready yet, remember you can still join the Mages Guild early-on and get the quest, then go build up your strength for going to Ondil when you have leveled up a bit. Joining the Mages Guild will immediately give you the Mages Guild Skill Line which will help you build you up too; regardless of your class. Besides, if you are going to brave The Ruins of Ondil -- you may as well earn the additional rewards of beginning your first dangerous Mages Guild Quest while you are at it -- and come back the victorious hero who brings back these Long Lost Lore Books.
Tips on What Else to do Before Heading to Ondil
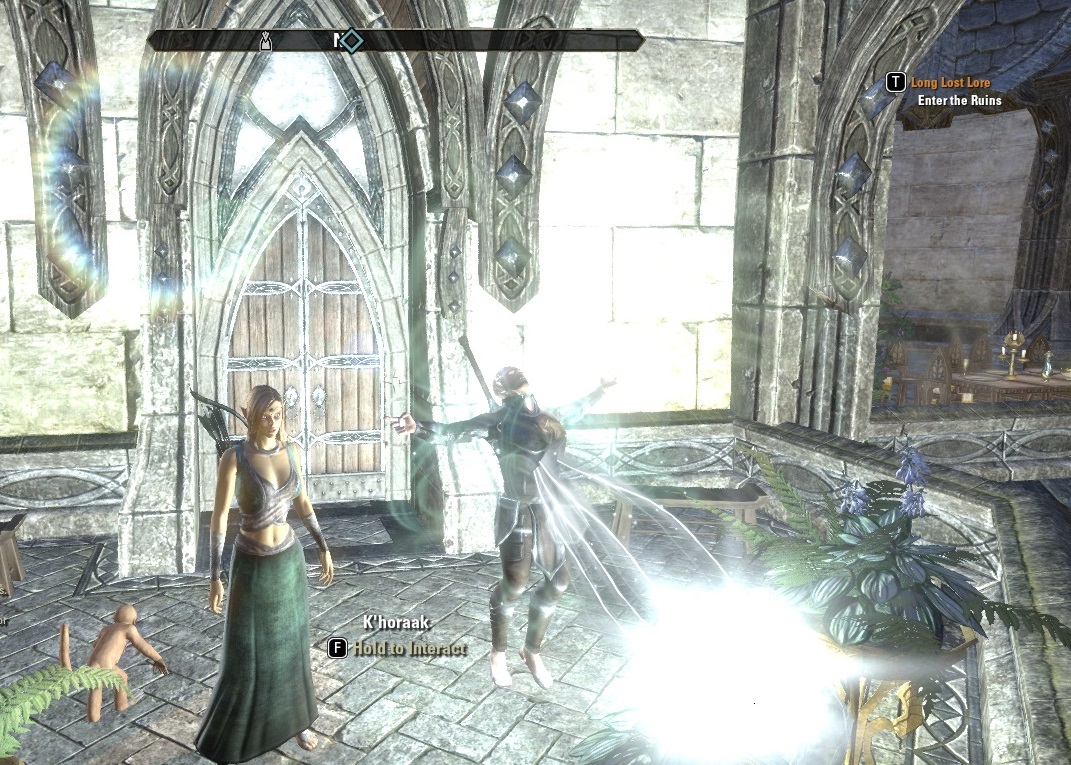
Now is a good time to use the Alchemy Lab at your Mages Guild, to brew up some potions to help you in Ondil and at the same time clear up some inventory space of many of those ingredients. You may wish to leave extra room in your inventory, before heading to Ondil; so you will have room for the valuable loot you may find and collect from delving down in Ondil’s depths. Once you receive the quest from Valaste at the Mages Guild, a message will appear saying; Long Lost Lore: Enter the Ruins. The quest will also be added to your Journal.
Your quest-giver, Valaste will allude to a few of the monstrosities you will have to face in the ruins that she is sending you to, and mention in passing that you should be careful because “Ondil is a dangerous place”; but in your quest message in the top right of your screen and on your map will say “Enter the Ruins” instead of just Ondil.
Hint: Before leaving the Mages Guild, go upstairs and look for a desk by a second floor door to outside that has a scroll and a book on it. The scroll (which we are really after at this point), is called Aluvus Journal and will emanate visible light waves from it, so you will notice it. Ondil will be marked on your map also as Ondil, by opening this scroll and you will get more of a mysterious hint from reading the scroll about some of the types of ‘pale’ beings you may face in Ondil and a taste of the kind of shenanigans that go on down there; especially if you are any good at reading between the lines. While by the table, you can also open the little book next to the glowing scroll too, because this book (called ‘The Fall of Carac Dena’), will mark Carac Dena on your map for another future adventure. Of additional benefit, opening both the scroll mentioning Ondil and the book next to it -- can raise your skill points in some areas, just by reading them. While you are upstairs explore the Mages Guild balconies for a Sky Shard!
Braving the Ruins of Ondil and getting the Long Lost Lore Books
Now that you have discovered the ruins of Ondil one way or another, what can you expect? As you approach the ruins of Ondil there will usually be some related enemies lurking around outside and particularly guarding the immediate path to the stone entrance stairs and the entranceway. Try to sneak past some of them or fight your way through, and then jump up on the stone platform and then down the circular stairs to the stone-door entrance down into Ondil. If you have any trouble getting in the door; just reposition yourself and try again and the E symbol allowing you to enter should appear and you will get a loading screen and get inside. When you load in you will see a message flash saying, “Completed: Enter the Ruins” then “Retrieve the Tomes: 0/4”. As you obtain the books, this will count-up for you and let you know when you have retrieved 4/4 (four out of four lore-books), so that you can easily track your progress without getting too distracted.
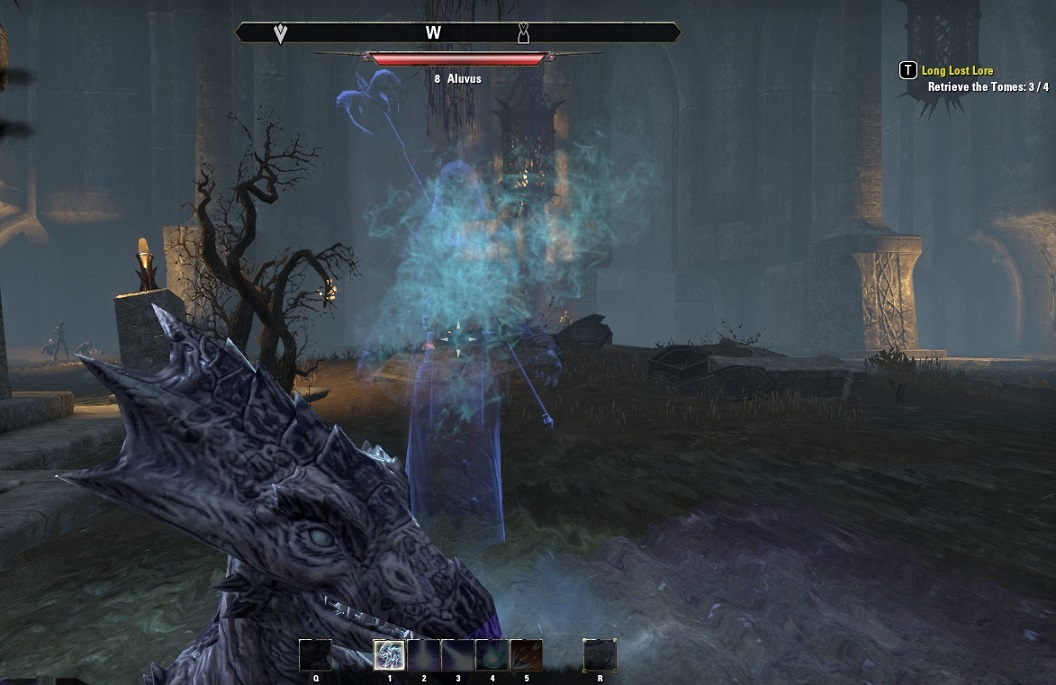
Ondil is a Level Eight Ruin. If you made it past any initial Blood Thrall spawns or mobs that spawned after you entered you will need to go find the Lost Lore Books and retrieve them, all the while trying not to get killed. Yes, admittedly I have been prone to trying to attempt things too early, and I first attempted Ondil alone before I was Level 8 and so I know what happens when you die! Yet, the good news is that there is a place just inside the entrance to Ondil that looks like a lit mini-wayshrine alter, that the ESO game can send you back to if you die; instead of orbing you to a further away wayshrine on the outer world map. When I died in Ondil, I definitely liked this feature.
Once inside you might not be attacked until you run down past the initial entry path. So you may take notice of the light mini-shrine right after you enter, as this is where you will be able to reappear if you die, instead of having to transport to an outer world wayshrine, if you do not have a soul gem to be able to choose to transport back to your exact spot where you died down in Ondil. Regardless of your level, you may still want to bring several filled soul-gems with you, so if you get killed you can choose to resurrect back into the same spot in Ondil instead of going all the way back to the entryway; and avoid having to get back through where you already made it past enemies, to find more books.
You can expect the enemies inside to be anything between Levels 7 and 8 or above, and though it is recommended players be at least level 8 to even attempt this in normal mode. It may be possible to do it when you are at Level 6 or 7 if you are either not afraid to die a few times, or you have a really good well-rounded group of at least two to four who are not too low level.
For example, when I was new to ESO, and I rather humorously first attempted Ondil alone at Level 5, I managed to stay alive long enough to notice that some of the enemies were called Blood Thrall and I let them hit me a few times in the hopes of getting Vampirism, but since they were not actual Blood Fiends; none of my deaths at their hands gave me vampirism. (So feel free to read our Vampire Guide here, if having a Vampire bite your neck is what you would like).
Nevertheless, I later came back and tried Ondil again at Level 6 and I still died a bit, although I gained fighting experience and leveled my Breton Sorcerer character to Level 7. The spells, weapons and fighting strategies you try using in Ondil will all help you gain experience and level up skills. Sometimes Ondil will be more crowded and have more enemies than other times. For example, during one of my own low-level tries at Ondil it was a bit crowded and there were so many Blood Thralls all over the place – I gave it a good fight – but I died! Then I saw a Khajiit Nightblade friend resurrect by the entry alter about the same time as me, (since we had both obviously died alone), so we grouped up and we were able to both finish it together , and get more loot, experience and fun out of it to boot.
It makes a big difference to have more than one player together in Ondil, especially if you are playing a lower level character at the time. If you have a group of four, try using Healer, a Tank and two DPS; but you may be able to do it with just two players if you are sneaky at the right times and watch each other’s backs too. If you need to try it with a group of only two, then it will help if you are both versatile. One player can act like more of a Tank and DPS, while the other player sneaks towards each book and uses mostly ranged attacks, so as to grab the books while the other player distracts enemies and then charges back towards the other player to help as soon as the book is grabbed, then moves on to get the next book together.
We all have our playing styles, but this ended up working fantastic for me and my Khajiit friend, and can work for you too. Each time you try to complete the objective of getting to a book alive, past the enemies who are trying to stop you, you will have to face crazed Blood Thralls; so have healing potions on hand, or keep a healer nearby who can keep an eye on your group members and keep healing them, as you fight. Dodge spells as best you can, as you will usually see their displayed affects in time to jump or dodge them if you stay alert and quick. It will help if you have practice at jumping and rolling out of the way of spell-traps cast on the ground too. If you are at least the recommended Level 8 (and/or in a group), it will be easier to make it through Ondil on your first attempt.
Either way, this is a really fun adventure. The Ondil ruin itself is not too huge for a Level 8 player and once you approach an alcove type area to your right for a book, (just before downward stairs), be ready to fight some Blood Thralls spawned in a corner there, unless you want to quickly pick them off with arrows first. The thing about ranged attacks in Ondil is, that as soon as you pick off any group of Blood Thralls there will usually be one that manages to jump out of the fray and start charging straight for you like a tank; so be prepared to have to finish at least one of the Blood Thrall of any group at closer range. Once you dispatch them; head down some large stairs that open to a main courtyard to find The Winds of Change book on a stone table.
Be aware that you will face several Blood Thrall enemies going down the stairs, and wherever you go in Ondil thereafter, but some of them will have really good loot on them. For example, one of my favorite loot weapon items I found on a Blood Thrall that I killed was called Sea Serpents Tooth. There are also four lock-picking chests in Ondil. (Feel free to peruse our Lock-picking Guide that is also here, if you need lock-picking tips.) To find all the Lost Lore Books, you will need to finish by going up and down various stairs and wind around Ondil some here or there, but if not for the enemies the Books would not be too hard to find since most of them are visible, or their quest markers are easy enough to spot even if you are busy fighting.
Once you make it down into Ondil far away from the entrance, look for a back room near a far back corner, with a Sky Shard in it, before continuing on. You may also find a note on a side table in Ondil that adds to the intrigue, because it may have been left by Aluvus, who is that very same Aluvus who wrote the Journal of Aluvus on the scroll that was on that table in the upstairs of the Mages Guild, that marked Ondil on your map; if you opened it as we hinted for you to do before heading to Ondil! So to satisfy your curiosity, go ahead and read it. In fact, check out as many of the book-shelves and loot as many areas and Blood Thralls as you can, whilst in Ondil. As you near the end, you will also receive your Achievement of ‘Explore Ondil’, which will flash on your screen with a picture of a Treasure Chest, with a 10 point reward for having explored and cleared Ondil – you are almost victorious! Once you have rescued all four of the Lost Lore Books in Ondil, including Summoning of the Mage, you will have 4/4 in your onscreen Lore-Book count and suddenly The Arch Mage Shalidor will personally appear before you, as a spirit and verbally praise you out-loud –Well done! Arch-Mage Shalidor is an incredibly magical and powerful male Nord wizard-mage from the First Era, so receiving praise and approval from him is quite an honor! You will then receive the onscreen message -- Retrieved the Tomes: Return to the Mages Guild. When you check-in to the Mages Guild, returning victorious from Ondil, you will discover your exciting adventure is hardly over – but instead just getting even juicier!
Completion and Rewards
- Players successfully braving Ondil will get 10 points and an Achievement just for exploring and clearing Ondil.
- Yet, by using this guide and joining the Mages Guild prior to going to Ondil, you should have obtained the wonderful Mages Guild Skill Line and gained some other extra benefits from them.
- You will have found some books at the Mages Guild that raise your skills just by reading them, and some that also mark Ondil and another ruin on your map.
- You will have found a Skyshard on the Mages Guild balcony, yet before leaving Ondil, remember you may want to look for an additional Sky Shard that is in there in a far back corner room of Ondil.
- You will also have found four lock-picking chests in Ondil and hopefully lots of cool loot, such as the magical weapon called the Sea Serpents tooth!
- You will also be able to loot weapons like a Maple Staff of Lightening and such, off of defeated Blood Thralls.
- Once you have finished obtaining all the Lost Lore Books in Ondil, you can go back to report your victory to the Mages Guild for more credit.
Go back and report to the quest-giver Valaste at the Mages Guild. You have earned the right to see what further rewards await you as a courageous Mages Guild Member, and as one who has come victorious out of the dangers of the ruins of Ondil! Now that you are a full-fledged member of the Mages Guild, you will get to obtain special training for extra advantages from the Mages Guild too! However, when you report back successfully to Valaste at the Mages Guild with the Lore Books in hand, you will discover that you need to help uncover the secrets of the books author and finish the Long Lost Lore Quest.
It turns out; these Lost Lore Books are full of Ayleid inscriptions that not even Valaste can decipher without magical help. After all the trouble you went to in order to obtain these special Long Lost Lore Books, Valaste is going to have to ask you to throw them into a fire in an big fire altar bowl in the Mages Guild called the Arcane Blazier. Yet fear not, for although this magical fire will devour the books, it will reveal from them what Valaste needs to know. Valaste will then have you do a Spirit Attunement to the great Arch Mage Shalidor with an Orb. Arch Mage Shalidor will appear right before you there in the Mages Guild. It seems that the Daedric ‘Mad God’, Sheogorath stole (and pulled into the Shivering Isles), the wondrous isle refuge called Eyevea; which Shalidor had created for Mages. Shalidor wants to get Eyevea back and needs your help to do so. You are one step closer to one of your very special rewards, which is a magical amulet to be worn on the neck which adds 2 Magicka Recovery and will Increase Max Magicka by 16. This is called The Amulet of Eyevea and it will bind on equip, so if you plan to give it to a friend, just do not put it on first or it will become bound to you, and you will only be able to give it to your other player characters by putting it into the bank for them to pick up. Of course after all you do to get it, you may just want to keep it for yourself, but knowing about its ‘Bind on Equip’ will make it your choice. By completing Ondil you will have also gained the chance get the rewards of 228 gold coins along with The Amulet of Eyevea; but not until you finish helping the Spirit of the Arch Mage Shalidor, who has more dangers for you to face before fully completing the Long Lost Lore quest!
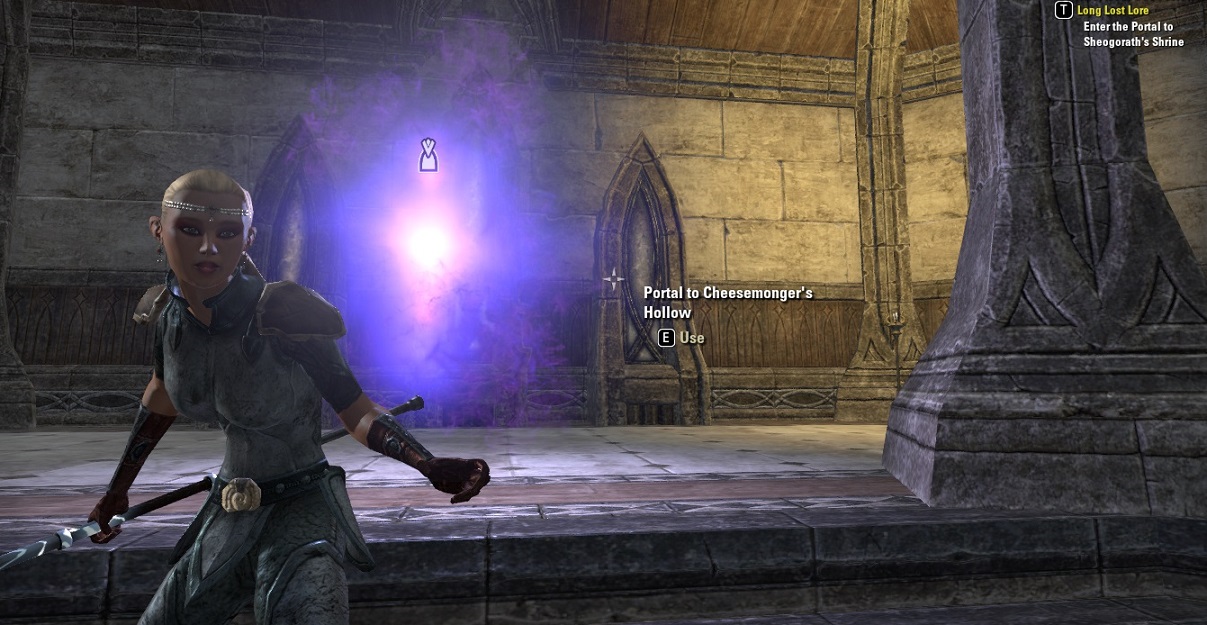
Shalidor will talk to you and explain to you about all this and how he needs you to enter the portal he will make to Sheogorath’s realm, called Cheese Monger’s Hollow; to perform some tasks to help Shalidor get back the Eyevea refuge he had created. When you are done talking to Shalidor he creates a Magical Portal right there in front of you, in the Mages Guild; that leads to Cheese Mongers Hollow. A message appears on your screen saying; “Completed Talk to Arch Mage Shalidor: Enter Portal to Sheogoreth’s Shrine”! Wahahaha! Dare you jump through the Magical Portal not knowing what the crazy Sheogorath make you will face on the other side? If you dare, see you there, ESO friends!
You need to login to add comments.



Comments ()